Had enough of trying to paint the embossed resist. It just never worked out. On to the next technique!
If you are not a trained or experienced painter, you can get a bit of the look of watercolors by coloring your stamps with water-based (not alcohol!) markers, and misting the stamp before you stamp. This makes the colors run together and gives the image that dreamy watercolor look. You can do this technique with any kind of water-based marker — Tombow, Memento, Stampin Up, Marvy, Distress, heck even Crayolas! But don’t try this with alcohol markers — they are not water soluble, so it won’t work, and they will just stain your stamps.
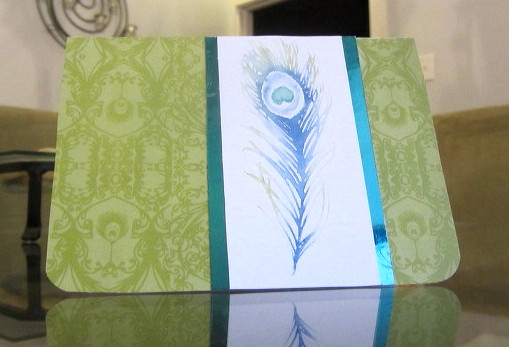
I enjoyed the painterly look I got by coloring my stamps with my Faber-Castell Stamper’s Big Brush pens on this card, so I thought I would try them first.
Stamper’s Big Brush pens are filled with India ink, and I confess that I don’t really know what that is. But it seems to be water soluble, because this technique works. These markers are designed to work this way — they are after all “Stamper’s Big Brush” pens. Jennifer McGuire has a video demonstrating this technique here. But it’s actually really easy: you just color the stamp with the markers — you can use multiple colors as you see here — then mist and stamp. Also, it works best on watercolor paper, too — this is Strathmore cold press paper.
Here, the central eye of the peacock feather didn’t stamp properly, so I scribbled a bit of the teal marker on my craft sheet, picked it up with a wet brush, and while the image was still quite wet, highlighted the eye so it was more clearly shaped and colored. Just a little bit, with a very light hand, and then I left the image to dry on its own. You can’t even tell it was manipulated.
I like the way the colors run together when you use this technique. It rather gives the impression of the iridescence of a peacock feather. This stamp is one of my favorites; it’s from Hero Arts.
The background paper is from a Recollections pad called “Pretty As a Peacock.” If you look closely you can see a subtle peacock-feather pattern on there.
You can do second-generation stamping with this technique as well, if you mist the stamp again after the first impression:

Here, the orange leaf on the left is the first impression, and the one of the right is the second. You may find you like the second generation better! The green leaf is also a second-generation stamp — the first I misted with too much water, and it was just too runny and indistinct when it stamped. The second generation turned out excellent, though.
This oak leaf stamp is from Rubber Stampede. It’s one of the very first stamps I ever bought. The white paper is the Strathmore again. The mats for these images are from a Core-dinations pack, and the card bases are Recollections kraft pre-scored cards. I also have an aspen leaf and a maple leaf — print a few more like this and they would make a nice card set to give as a gift.
So anyway, this is a really easy technique, and the results can look surprisingly sophisticated. I encourage you to try it with whatever water-based markers you have.
